The existing front end was pretty rough, so I sent out an extra set of A Arms to get new bushings and ball joints pressed in locally, while I took apart the front end.
There was a lot of rust and debris both in the A Arms and shock tower pockets, so the replacements will work well and the rust areas will get a solid dose of POR 15 to stop the rust from getting any worse. No structural concerns.
The new stuff
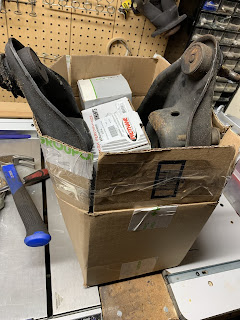
The old stuff
Online Resources
Mustang FRONT SPRING REMOVAL
- Jack up your car and support it with jack stands
- Remove the front wheels
- Remove the Sway Bar Endlink nuts and rotate the sway bar out of the way
- Remove the brake caliper bolts
- Slide the caliper off the rotor
- Remove the brake rotor from the hub
- Take off the ABS retainer nut, remove the bolt and ABS sensor
- Support the lower control arm with a floor jack
- Remove the strut nuts and bolts
- Free the spindle from the strut
- Lower the jack to allow the control arm to hang free
- Now you can remove the front Spring
- Install new urethane spring isolators on your new springs
- Install the new spring into the “saddle” on the control arm (pry bar is handy tool)
- Use the jack to raise the control arm
- Install the Caster Camber Plates (highly recommended)
- Remove the upper strut nut
- Remove the front strut
- Use a drill to remove the rivets from the factory camber plate
- Install the bolt plate with the notch facing forward (on underside)
- Drill holes for engine compartment support brace
- Install the bearing plate (follow instructions for proper slot alignment)
- Install retaining nuts
- Reinstall your strut - Now is a good time to replace them if needed
- Install spacer stacks according to included instructions
- Slide the strut shaft through the caster camber plate and tighten the nut
- Slide strut into the spindle and reinstall the strut hardware
- Reassemble the ABS and Brake hardware
- Reattach the Sway bar
- Repeat on other side
REAR SPRING INSTALLATION
- Lift the rear end of the car off the ground
- Remove the wheel
- Support with jack stands
- Remove the rear lower shock bolt
- Apply some downward pressure to the rear end to remove the rear springs
- Install new urethane spring Isolators (recommended)
- Install the new spring with the pigtail facing rearward
- Reinstall shock hardware
- Install the wheel & repeat on other side
Prothane Front Control Arm Bushings Installation
Learned this online:
Poly can be used in the front control arms with minimal increase in harshness and without any squeaking. The key is in the installation. Front poly bushings can induce a lot of harshness because of their design (at least the design of Energy Suspension bushings). The sleeves of the Energy Suspension front control arm bushing are shorter than the bushings. If you install the front bushings as they come, the k-member clamps down on the faces of the bushing when the bolt is tightened. Because the mass of the bushing has to go somewhere, it attempts to expand in the shell. (See Figs. 1 and 2)
The ends of the bushing are now clamped against the k-member and the perimeter of the bushing is pre-loaded in the shell. As a results, the control arm/bushing can't pivot or flex as needed. This is where the majority of complaints of queaks and harshness comes from with poly bushings in the front control arms.
The key to minimizing harshness and elimintating squeaking is to trim the end of the bushings so that the k-member clamps on the sleeve and not the face of each bushing. The end without the flange is the one that is trimmed. I use a hacksaw to trim them. By trimming the bushing, a clearance is provided between the bushing and the k-member (See Fig. 3).
The flange of the front and rear bushings keeps the front arms from moving front-to-rear relative to the k-member. The control arm cannot shift forward because of the flange of the front bushing and it cannot move rearward because of the flange of the rear bushing.
The result of this install technique is no squeaking and a ride that's nearly as smooth as with rubber bushings. I've used this install techique on SVO Mustangs, Fox-Body Mustangs and SN-95 Mustangs with excellent results.
Give it a try! You'll like the results


