Wednesday, December 29, 2010

Entry 18: Making Progress....

Installed the door scuff plates, mounted the tach, swapped in the new battery tray, started cleaning the interior and blocked off the dash bezel where the heater control goes. Later I'll add a gauge there but for now it works. Still need to wire up the tach, mounted it up high to crosspiece to avoid destroying the dashpad or any of the plastic pillars. 79-86 parts are getting hard to come by and are not being reproduced in any mass scale like the 65-73's. 


Spread some filler on the rocker panel where I welded the exterior patch piece in. Tomorrow I'll sand it down and prime/paint it.


Code Reader:
Purchased a code reader to determine if there were any further repairs to be made. Equus 3145 is a digital readout model I purchased for $30 shipped to my door. Looks like this......

.....and plugs into the OBD port under the hood:


When I dumped the KOEO codes received the following:


Stored:
Code 81 - Smog Equipment Delete
Code 82 - Smog Equipment Delete
Code 85 - Smog Equipment Delete


Continuous:

Code 18 - Ignition System Fault Thanks to NikwoaC at stangnet for figuring this out...

1. Faulty distributor, coil, TFI causing car to run poorly or not at all

2. Wiring issue surrounding the ECM Return Signal from TFI Connector. Car runs. Pin "5" on the TFI connector splits into three paths to trace back: Tach, Negative side of coil and ECM Pin 4 IDM (Ignition Diagnostic Module) which has an inline resistor of ~22,000 ohms. Check the resistor first if the car is running normally and throwing a code 18.

Verify resistor is bad by using DMM to measure resistance from in to out with car OFF. If out of range, or a huge number, find a 22K ohm 2W resisitor and cut out and splice in the new resistor. 


Tuesday, December 28, 2010

Entry 17: More Parts

Now that I have gotten the larger items accomplished, looking forward to getting some new parts to put on and finish it up:

1. Subframe Connectors: Summit Racing® Weld-On Subframe Connectors SUM 790100. Ones on the car are rusted through and need replacement.

2. Battery Tray BT11: CJ Pony Parts OEM style reproduction battery tray made from original Ford Tooling for a perfect fit. Constructed from heavy-duty black plastic. Original is broken and is not holding the battery properly.

3. Dome Light: Read somewhere 92-00 domelights will fit into the 79-93 fox platform with a slight bit of modification. We'll see what happens......

Sunday, December 26, 2010

Entry 16: Weather Stripping, Dew Wipes and Rear Hatch

When I acquired the car the rear seats had been removed and discarded, given there were only lapbelts for the rear passengers in 86' plus the 30 lbs+ weight savings I decided to delete the rear seat. Kits on the internet are $300+, with the roll of carpet from when I purchased the car I decided to make a run at it myself. Using a cardboard template I cut a piece of aluminum to go over the spare tire well and glued the carpeting to it. Fit really nicely and the carpet flows over the rear seat pan well into the passenger area.Used an extra piece of interior trim moulding spray painted black to cover the seam/transition to the carpeting in the front cabin. Actually turned out nicer than I expected, when I get a chance I'll upgrade to a nice polished aluminum piece.

Next up was weather stripping, CJ Pony Parts sells a WSKIT32 kit for $47 which includes both door seals and a hatch seal. They were easy enough to install with a heat gun, rubber mallet and a screwdriver. Just loosen the interior trim pieces, pull out the old and in with the new. The old hatch weather stripping was so flat following installation the striker had to be adjusted upwards 1/4"+ so the hatch would latch. The doors sound solid with new rubber.

Beltline weatherstripping (also known as exterior dew wipes) are an interesting installation, for what they cost be sure to do it correctly. The part has the rubber portion along with the metal piece to hold it in place. You need to remove the knob from the mirror and the metal trim piece, exposing two screws which hold the mirror to the door. In order to replace the wipes the mirror has to be removed, the old piece taken out and then a new piece installed and the mirror re-attached. The only tricky part is to ensure the clips are to the inside of the pinch seam or it will not attach properly. This is a really nice part and went on easily, plus it really cleans up the door line. WSBL17P


Scuff plates are always fun, hosed the old ones down with brake cleaner and sprayed with Trim Paint. I'll install tomorrow after they have a chance to dry.

Saturday, December 11, 2010

Entry 15: Engine and Brakes

Fuel System
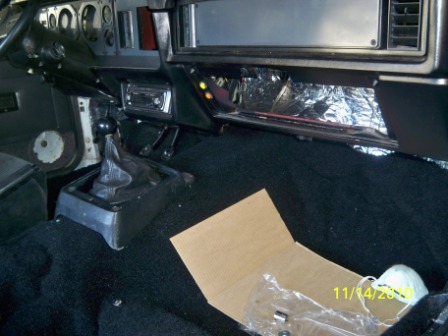
After finished installing the interior, I went to start the car and it would not start. Great. Engine turned over but would not catch.

Checklist for common failures:
1. Tripped inertia switch – press reset button
2. Fuel Pump power relay – located under the driver’s seat
3. Clogged fuel filter
4. Failed Fuel Pump
5. Blown fuse link in wiring harness.
6. Fuel pressure regulator failed.


Started by resetting the inertia switch, not the culprit. Next I checked the relay socket with the old relay installed. 12V on the yellow, but no voltage on the pink wire (out) with key on. I jumped the yellow to the pink on the back of the relay housing and the fuel pump whirred on, confirming a faulty relay. Went down to the Ford dealership and for the sum of $21.53 purchased a genuine Motorcraft relay which should last another 24 years. Got home and it fired right up!

Testing the relay socket (detailed):
1. Look for 12V on the Yellow wire, always hot
2. Turn on Key. Look for 12V on Light Pink wire (out to fuel pump, tests fuel pump) and on the Red/Black wire (switched accessory power, tests intertia switch) Inertia switch should have power on both sides. The Tan wire/Light Green stripe is a switched Ground to the ECM.
3. Drop the fuel tank, look for 12V on Pink wire with key in run and test to ground/black wire and should have <10 ohms.

Cooling System
Had a chance to drain out the old coolant (which was water), replace the upper and lower radiator hoses, and install a horseshoe at the heater core bypass. Taking a length of heater hose and forming a "U" will cause the hose to kink and restrict coolant flow. This is what may have been causing the overheating issue the PO described because right after the heater hose output is the temp sensor. Instead went down to NAPA and part # 11607 was pre formed and fit perfectly. Refilled the system with 50/50 Peak One and idled it up nicely.


Chasing a wandering idle:
Using the surging idle checklist over at stangnet.com, the most common source of wandering idle is a bad IAC, or idle air bypass valve. A dirty IAB will cause stalling when the engine is cold. First step is to remove the IAC/IAB, and clean with a toothbrush and throtlle body cleaner to remove the carbon buildup. Unfortunately, the original Ford part was beyond repair and this did not resolve it. Bought a replacement (Standard Motor Products# AC21) off of Rockauto for $41 on sale and bolted it on today. We'll see how it runs now, if its not this the next check is vaccuum leaks.

UPDATE: Replaced the IAC and it idles perfectly. Vast improvement, no more wandering idle.

If this had not resolved it, the next step would have been to check the TPS (Throttle Position Sensor) which works like a rheostat or variable resistor. A surging or hanging idle in particular is a symptom of a bad TPS. Check the voltage on the TPS, at idle it should be inititally set between 0.6 and 1.0 when the engine is warmed up. WOT should be around 4.25 (check when car is off). Don't forget to reset the computer afterwards so it re-learns the new setting. It will zero out everytime the car is started.

Still have to check the vacuum tree and connections, which can also cause a wandering idle. Starting fluid or oil can be sprayed to easily find a leak, the engine will surge when it is sprayed over the leak. Replace thge PCV valve if needed.

Dirty 10 pin connectors can also be a cause of idling, especially 1,2 and 5.

Poor grounds can also generate idle issues. Verify the main power ground cable from the battery is placed directly against the block and not on top of the bracket. Check to make sure the secondary ground strap is present from the cylinder head to firewall. If you are running a 3G alt it needs to be 4 gauge. Ensure the CPU ground wire under the hood is grounded, a black cylinder 2.5" long x 1.0" diameter with a black wire/light green stripe.
System voltage at idle should be 13.8 to 14.2 Volts.

Timing should be at a minimum of 10 and a nax of 14 (ex- boost or nitrous)

Spent last weekend pulling the rear drums apart and realized the parking brake lever was missing from the passenger side and likely causing the brakes to drag and the parking brakes to not function. Bought a set of rear drums complete with backing plates from a guy here locally for $10, scavenged the parts I needed and went to work, Replaced the parking brake cables, the wheel cylinders, brake pads, springs and all hardware. Bolted it all up and started the fronts.

After pulling the 16" ponies off the front I discovered good news and bad news. Bad news was the parts I ordered were not going to fit, having already ordered some replacement parts expecting the stock setup. Good news was the front spindles, rotors and calipers had already been upgraded to the heavier duty 87-93 ones. . This upgrade can run anywhere from $200 to $500 so I am not concerned with the parts I couldn't use.

Learned two easy ways to identify whether the 4 eye had been upgraded to 87-93's:
1. Banjo Bolt connections (79-86 hoses screwed directly into the caliper)
2. Metal Dust Shields (79-86 had plastic)


Saturday, November 13, 2010

Entry 13: Finishing Up The Interior

Finished installing the foil faced cotton batting on the front of the cabin and on the firewall, everything is sealed up to resist heat and noise.


Next is the carpet, you can really see the difference a new carpet makes on an interior. Also installed the doorpanels and armrests I acquired through http://vb.foureyedpride.com/ .


 Dash pad looks nice, I just need  to clean it up now that it is installed.


Still have some wiring to clean up and final carpet fitment and installation, but everything is starting to come together.


Sunday, November 7, 2010

Entry 12: Sound Deadener

Went ahead and moved into the cabin area this weekend, and accomplished quite a bit. Used the aforementioned Second Skin on the firewall and on the rear passenger seat area for extra insulation, then covered the rest with the RaamMat sound deadener product. Took me approximately 5 hours to lay down the deadener throughout the passenger cabin area. I really like the combination of the thicker (and heavier) Second Skin in the areas most susceptible to heat and noise and RaamMat on the rest.

After I finished that I started installing the foil faced cotton insulation I got from Home Depot, and sealed the seams with aluminum HVAC tape. The rear seat area and the back portion of the cabin are completed, just have the front portion and the firewall and will be ready to install the carpet and seats. Almost there!


 Still waiting to hear back about the missing passenger side seatbelt....

Saturday, November 6, 2010

Entry 11: Headliner and Insulation

For the headliner, I used the noticeably heavier Second Skin sound deadener followed by the foil faced cotton batting. Instantly noticed a difference, completely removed the tin can sound effect when tapping on the roof. The 2nd Skin is also noticeably heavier and thicker than the Rammmat and the Quick Roof.  The only issue I would have using it throughout the car is the weight, there is a big difference. Finally I installed the headliner and it looks sharp. Not perfect but a noticceable improvement.


Once the headliner was installed I went ahead and started on the rear hatch area. The sound deadener followed by the foil faced cotton batting will really quiet it down inside. Once that was finished I went ahead and re-installed the interior. The only thing I am missing is a passenger side seatbelt, the set I bought had a front drivers side but a rear passenger set. Not sure how that happened but I contacted the seller this morning,

Sunday, October 24, 2010

Entry 10: Finished Welding and Headliner

Today I managed to get the rear passenger seat pan patched and sealed up, when I have a chance I'll take some pictures and post them. Fairly similar to prior patches other than I had to fabricate it out of sheet metal myself. Used weldable primer and then followed up with the Rust Encapsulator.

Also had a chance to start laying down the sound deadener, with all the repairs completed the hardest part is cutting out the pieces to the proper size.


Before I can reassemble the interior I have to get the headliner in. Last week I pulled out all the crumbly rats nest sound deadener from the roof, after I put the Second Skin and UltraTouch on the roof I'll be ready for this to go in. 

Add caption


Bought some 3M super trim adhesive 08090 aka "90" for $14 and a 4' by 4' section of fabric from Joann Fabrics for $8 and went to work


The old fabric peeled off quite easily leaving the foam behind. . It is not perfect, however I am pleased with the results and should be an immense upgrade from the Torch Red which was spray painted black.


Sunday, October 10, 2010

Entry 9: Sound Deadening and....

Well, I went ahead and started pulling out the interior to put in the sound deadener. Raammat for the passenger compartment floor and rear seats, Second Skin on the firewall and four rolls of Quick Roof QR 625 from Home Depot in the back. Mufflers are right under the rear seat and the engine heats up the firewall so those areas get the premium supplies. Not sure about the outer door skins yet. Purchased 96 square feet of closed cell neoprene foam from the Foam Factory for $33 plus $12 shipping, quite a deal. Once that is all laid down have a new black carpet from ACC. The layers of mass backed, closed cell, jute and carpet should make this sound like a BMW instead of a tin can.

In addition, I ordered a 4' by 24' roll of Ultra Touch foil faced cotton radiant barrier 30000-11424 from Home Depot online for $59. This is great stuff, I'll use it on the firewall and roof as an extra layer.

Rear trim panel and underlay pulled off easily on the drivers side, sprayed Simple Green to degrease the metal panels and quickly figured out I would need to follow it up with a bit of brake cleaner to prep the surface. Important part here is to remove the factory underlay/mass backed as it is old and dirty. Cut the QuickRoof to pit and press down. Quick pass with the heat gun and it all rolls down nicely. No smell or any sort of odor, not sure where that rumor came from. Covered as much of the quarter panel as I could reach, the wheelhouse and the upper sail panel. I pulled the headliner out to strip and re-cover, once that is re-installed I will re-install all the trim pieces.


I was excited to be wrapping this up and putting it back together, which was quickly dampened. When I pulled back the factory underlayment on the passenger side I quickly realized there would be a few more hours of welding in front of me. The passenger side rear floor pan was covered in dynamat, hiding that it rotted out around where the seat belt mounts. Additionally, metal duct tape held a piece of galvanized steel over the frame rail. Good news is torque boxes are solid and undisturbed. I vaccumed out all the rust and used Rust Encapsulator to seal up the frame rails. Next I'll weld a piece in and be good to go. 


Here is an idea of the rusted portion of the rear deck I have to replace. not bad, just extra work for me. Already scraped it down, vaccumed out the rust, and applied a heavy layer of Rust Encapsulator. I have to say the quart of RE from Eastwood has lasted the entire project so far and has worked well. 

Entry 8: Finished the Floorpans and Rocker Panel Repair

Finally finished up the passenger side floorpan repairs and rocker panel patch, and covered it all in POR-15 inside and out. Looks really good, and most importantly structurally sound. Also got the seat brackets fabricated and welded in, not sure which car the seats are out of but they sure are comfortable! Now that the car is sealed up I can start to put it back together.


Sunday, September 19, 2010

Entry 7: Passenger SIde

Well I dug into the passenger side and quickly discovered quite a bit of rust which was hiding in the rocker panel. It is so bad in one area I can see through the rocker panel.......

Went ahead and cut it all out but need to purchase a patch panel for it due to the area showing externally and I can't seem to fabricate the required curves and bends from scrap metal. There are too many planes involved to get it right, in order to use filler as little as possible the metal has to be perfect.