Saturday, November 13, 2010

Entry 13: Finishing Up The Interior

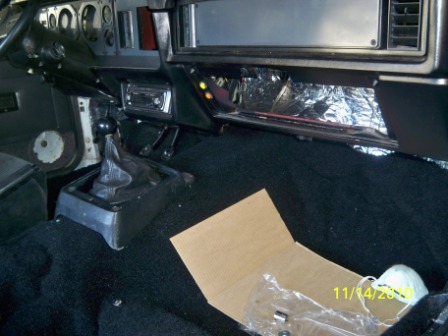
Finished installing the foil faced cotton batting on the front of the cabin and on the firewall, everything is sealed up to resist heat and noise.


Next is the carpet, you can really see the difference a new carpet makes on an interior. Also installed the doorpanels and armrests I acquired through http://vb.foureyedpride.com/ .


 Dash pad looks nice, I just need  to clean it up now that it is installed.


Still have some wiring to clean up and final carpet fitment and installation, but everything is starting to come together.


Sunday, November 7, 2010

Entry 12: Sound Deadener

Went ahead and moved into the cabin area this weekend, and accomplished quite a bit. Used the aforementioned Second Skin on the firewall and on the rear passenger seat area for extra insulation, then covered the rest with the RaamMat sound deadener product. Took me approximately 5 hours to lay down the deadener throughout the passenger cabin area. I really like the combination of the thicker (and heavier) Second Skin in the areas most susceptible to heat and noise and RaamMat on the rest.

After I finished that I started installing the foil faced cotton insulation I got from Home Depot, and sealed the seams with aluminum HVAC tape. The rear seat area and the back portion of the cabin are completed, just have the front portion and the firewall and will be ready to install the carpet and seats. Almost there!


 Still waiting to hear back about the missing passenger side seatbelt....

Saturday, November 6, 2010

Entry 11: Headliner and Insulation

For the headliner, I used the noticeably heavier Second Skin sound deadener followed by the foil faced cotton batting. Instantly noticed a difference, completely removed the tin can sound effect when tapping on the roof. The 2nd Skin is also noticeably heavier and thicker than the Rammmat and the Quick Roof.  The only issue I would have using it throughout the car is the weight, there is a big difference. Finally I installed the headliner and it looks sharp. Not perfect but a noticceable improvement.


Once the headliner was installed I went ahead and started on the rear hatch area. The sound deadener followed by the foil faced cotton batting will really quiet it down inside. Once that was finished I went ahead and re-installed the interior. The only thing I am missing is a passenger side seatbelt, the set I bought had a front drivers side but a rear passenger set. Not sure how that happened but I contacted the seller this morning,

Sunday, October 24, 2010

Entry 10: Finished Welding and Headliner

Today I managed to get the rear passenger seat pan patched and sealed up, when I have a chance I'll take some pictures and post them. Fairly similar to prior patches other than I had to fabricate it out of sheet metal myself. Used weldable primer and then followed up with the Rust Encapsulator.

Also had a chance to start laying down the sound deadener, with all the repairs completed the hardest part is cutting out the pieces to the proper size.


Before I can reassemble the interior I have to get the headliner in. Last week I pulled out all the crumbly rats nest sound deadener from the roof, after I put the Second Skin and UltraTouch on the roof I'll be ready for this to go in. 

Add caption


Bought some 3M super trim adhesive 08090 aka "90" for $14 and a 4' by 4' section of fabric from Joann Fabrics for $8 and went to work


The old fabric peeled off quite easily leaving the foam behind. . It is not perfect, however I am pleased with the results and should be an immense upgrade from the Torch Red which was spray painted black.


Sunday, October 10, 2010

Entry 9: Sound Deadening and....

Well, I went ahead and started pulling out the interior to put in the sound deadener. Raammat for the passenger compartment floor and rear seats, Second Skin on the firewall and four rolls of Quick Roof QR 625 from Home Depot in the back. Mufflers are right under the rear seat and the engine heats up the firewall so those areas get the premium supplies. Not sure about the outer door skins yet. Purchased 96 square feet of closed cell neoprene foam from the Foam Factory for $33 plus $12 shipping, quite a deal. Once that is all laid down have a new black carpet from ACC. The layers of mass backed, closed cell, jute and carpet should make this sound like a BMW instead of a tin can.

In addition, I ordered a 4' by 24' roll of Ultra Touch foil faced cotton radiant barrier 30000-11424 from Home Depot online for $59. This is great stuff, I'll use it on the firewall and roof as an extra layer.

Rear trim panel and underlay pulled off easily on the drivers side, sprayed Simple Green to degrease the metal panels and quickly figured out I would need to follow it up with a bit of brake cleaner to prep the surface. Important part here is to remove the factory underlay/mass backed as it is old and dirty. Cut the QuickRoof to pit and press down. Quick pass with the heat gun and it all rolls down nicely. No smell or any sort of odor, not sure where that rumor came from. Covered as much of the quarter panel as I could reach, the wheelhouse and the upper sail panel. I pulled the headliner out to strip and re-cover, once that is re-installed I will re-install all the trim pieces.


I was excited to be wrapping this up and putting it back together, which was quickly dampened. When I pulled back the factory underlayment on the passenger side I quickly realized there would be a few more hours of welding in front of me. The passenger side rear floor pan was covered in dynamat, hiding that it rotted out around where the seat belt mounts. Additionally, metal duct tape held a piece of galvanized steel over the frame rail. Good news is torque boxes are solid and undisturbed. I vaccumed out all the rust and used Rust Encapsulator to seal up the frame rails. Next I'll weld a piece in and be good to go. 


Here is an idea of the rusted portion of the rear deck I have to replace. not bad, just extra work for me. Already scraped it down, vaccumed out the rust, and applied a heavy layer of Rust Encapsulator. I have to say the quart of RE from Eastwood has lasted the entire project so far and has worked well. 

Entry 8: Finished the Floorpans and Rocker Panel Repair

Finally finished up the passenger side floorpan repairs and rocker panel patch, and covered it all in POR-15 inside and out. Looks really good, and most importantly structurally sound. Also got the seat brackets fabricated and welded in, not sure which car the seats are out of but they sure are comfortable! Now that the car is sealed up I can start to put it back together.


Sunday, September 19, 2010

Entry 7: Passenger SIde

Well I dug into the passenger side and quickly discovered quite a bit of rust which was hiding in the rocker panel. It is so bad in one area I can see through the rocker panel.......

Went ahead and cut it all out but need to purchase a patch panel for it due to the area showing externally and I can't seem to fabricate the required curves and bends from scrap metal. There are too many planes involved to get it right, in order to use filler as little as possible the metal has to be perfect.

Sunday, September 5, 2010

Entry 6: More Floor Pan Work


Went ahead and cut out the portion of the front drivers side floor pan which had rotted through. Looks like the heater core leaked and water ran over the transmission tunnel and into the floor pans. Had some rust up the toeboard, so I'll put a piece together to seal that up. The factory firewall pad is super flammable jute padding with rubber over it, plan on cutting it out and putting some damplifier and firewall mat on it and calling it a day. The factory stuff is no good.


Update: Haven't done much since the 29th because I caught a nasty flu bug going around, hopefully I'll feel better and be able to finish these pans up.


Had a chance to cut out the patch panel, apply bloxide to the areas which will be welded. and POR15 the areas under the drivers toeboard which were rusty but did not need to be cut out. No one will see it so I slathered on the POR15. Next thing to work on is the toeboard.


9/12: Had a chance to cut out a toeboard patch panel, used a cardboard template to rough it out.
And here is the installed patch panels, safe to say that the cabin is sealed from road and engine noise. Took the better part of 6 hours to fabricate the toeboard, prime and seam weld the front drivers floor pan. Welds are not the best in the world but they are solid and seam welds leave no room for water to collect and rust out. Once I get the passenger side worked up I will seam seal everything and put down sound deadener. Thinking about using the quick roof as the mass back and then Damplifier for the vertical runs and the roof.
Passenger side is next, not as much to patch but there are a few sections to address.

Entry 5: Welding

Got a chance to weld in the rear portion of the drivers side floor pan. Ended up finding more rust up the rear apron so I cut it out and fabricated a piece to support the rear seat pan.

Update: Here is a\of the welded rear portion of the drivers side pan with POR15 applied to eliminate any surface rust.

Sunday, August 22, 2010

Entry 4: Rear Floorpan

Went ahead and got everything cut out today from the back of the rusted pan, next up is to cut the new one to fit and prep the area for welding.


The middle of the floor area is actually solid, my two problem areas are the toeboard by the pedals/inner frame rail area and towards the back where I am working now.


I'll split the the full length pan, which will be easier to work with and maintain the structural integrity of the chassis. No sense in creating work for myself, there's enough to go around.

Entry 3: "Great Stuff" Removal

Went ahead and dug into the floorpans last night, had to grind down all the welds to remove the heavy 16 gauge piece which was welded in.

The Prior owner had welded in a heavy 16 gauge sheet of steel over the swiss cheese floorboards to put the seats on and filled the the space with foam insulation.

What mess underneath.

The "Great Stuff" insulation trapped water and made it worse, but it is irrelevant because I am cutting it all out. Good news is the rockers and transmission tunnel are solid.

Tomorrow I 'll cut everything and get it ready for welding. Looks worse than it is, it all gets cut out anyways.


Entry 2: Inventory

I went through the items piled in the hatch and discovered the entire interior was there except for a dash pad and the rear fold down seats. The seats in the car are a Rally Style seat and are not Mustang seats but I'll fabricate seat mounts to use them. Needs a carpet, black seat belts and new door panels, but looks good. I think I will end up building a rear seat delete because the car really looks sharp with just two front seats and fold down seats are difficult to find. Also has an extra 91 dash board and other parts with it.

Entry 1: Purchase

I purchased an 86 GT from someone I knew in Port St. John. The car is mechanically sound, with an 92 roller motor, new windshield, manual rack, 3.55 posi, brand new clutch, and black ponies. Also got some other parts in the transaction like a transmission and extra set of rims and E7 cylinder heads.

Saw the ad on Craiglist and headed down after work with my dad in the truck, loaded it up and headed back. Clean title, now it needs to be put back together. Good news is the title is clear and in hand.

One of the main issues with the car is the drivers side requires a new floor pan. Someone welded in some thick metal and sealed it with window foam so it needs to come out. Because the interior is completely gutted, its the first thing to address. No sense in putting it together just to pull it apart again. Car came with a replacement floor pan so I might as well weld it in. Also has a sizeable exhaust leak at the manifold.

What needs to be done now:
Rebuild brakes and re-pack front bearings
Drop and clean out fuel tank, new fuel filter
Check for Vacuum leaks
Exhaust Leak
Cooling System- Add Electric Fan, New Hoses, Thermostat, flush system.

Later:
Shocks and Struts
Refresh Axle Fluids and Bearings


More to follow, here are a few pictures from the original ad.